To prepare to teach a TechnoKids technology project, read the Teacher Guide. This document includes preparatory steps, material list, lesson plans, and answer keys. Once familiar with the activities, you are ready to create assignments in Google Classroom.
Determine the Type of Assignment
To start, review the TechnoKids assignment. Use the flowchart and questions to determine the Google Class Assignment settings you must apply.
- Does the assignment have step-by-step instructions only?
- Does the assignment include questions students must answer?
- Does the assignment require a template that each student needs to produce unique work?
- If the task uses a TechnoKids template, has it been converted into a native Google format? (If not, refer to Step 2)
- Does the assignment require a sample that students view?
- Does the assignment have students create a new file using Google Apps?
Create an Assignment
Create an assignment by providing a description of the task. Attach the assignment file along with any templates or sample files to the post.
- Open the Class in Google Classroom.
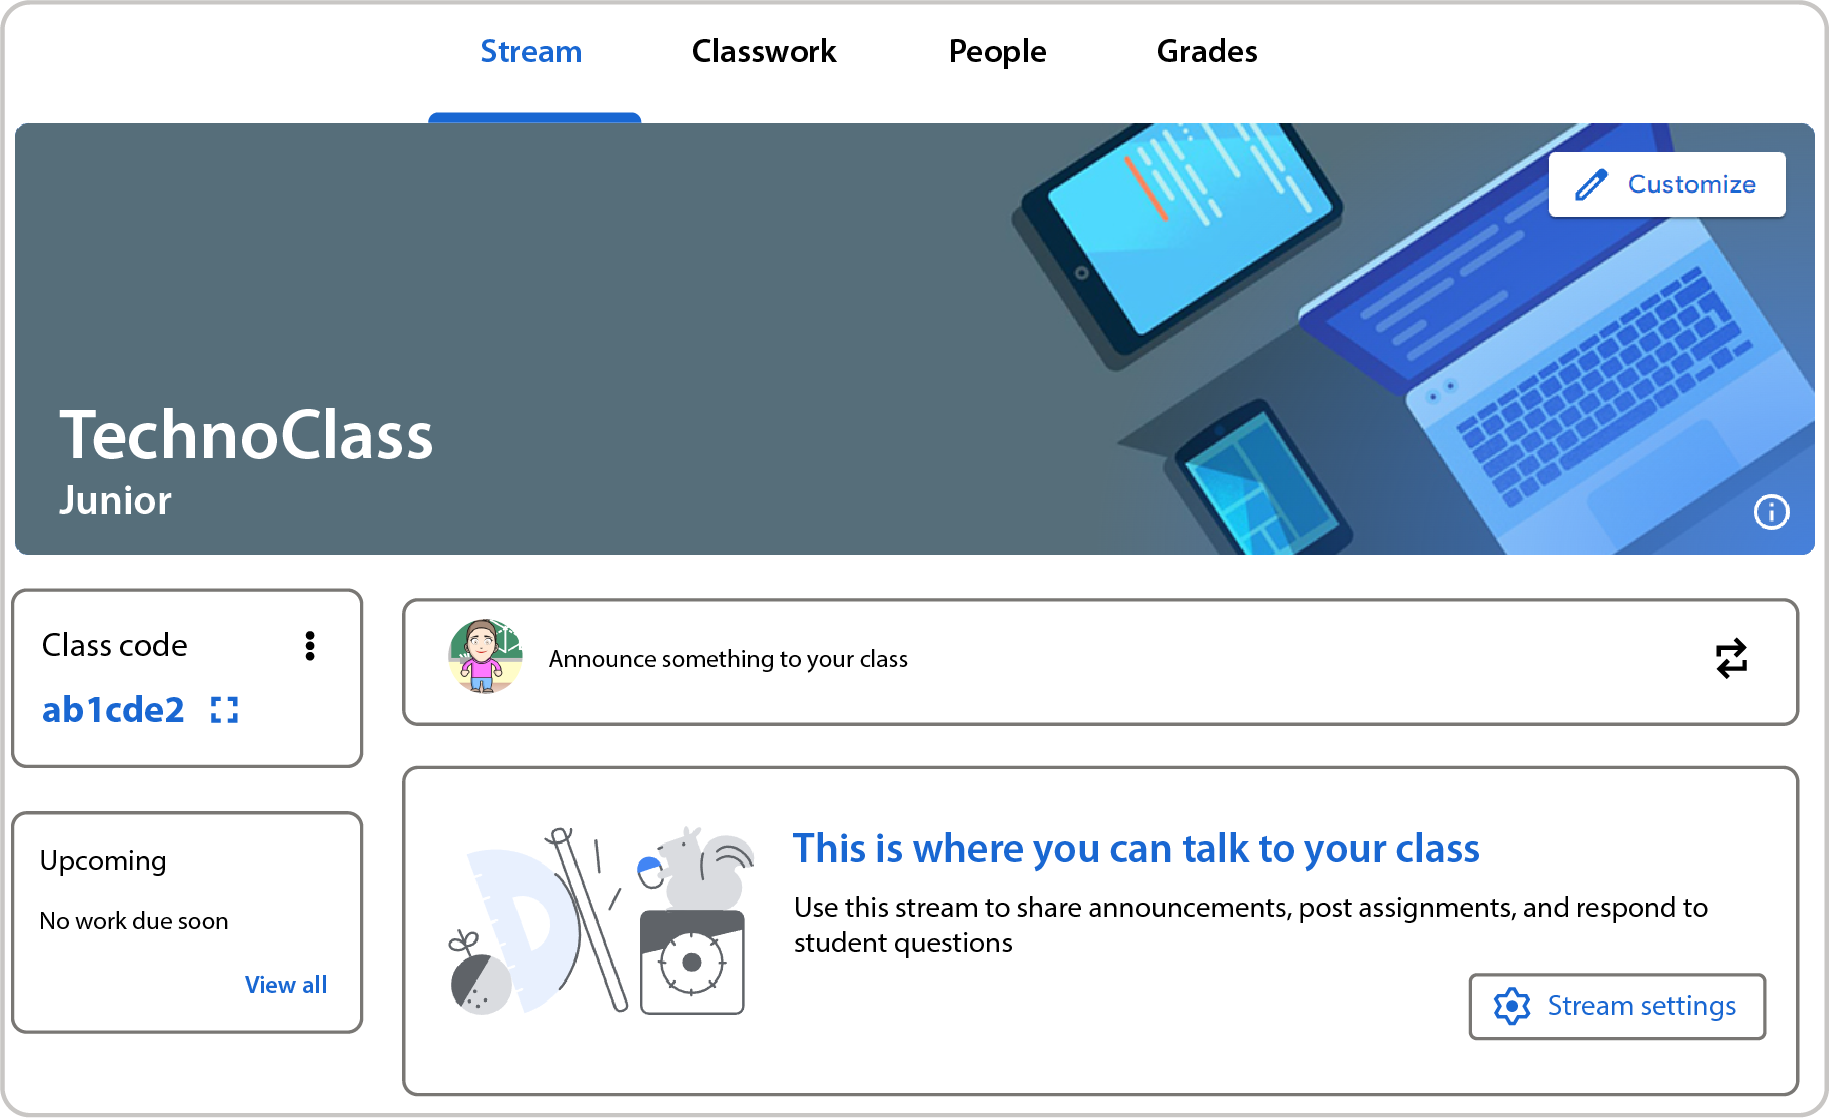
- Click the Classwork tab.

IMPORTANT | The Stream tab is best used for sending messages to students. When creating assignments you MUST USE the Classwork tab. This will allow you to select the option Make a copy for each student when adding assignments.
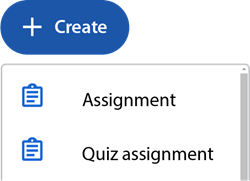
- Click Create and choose Assignment from the menu.
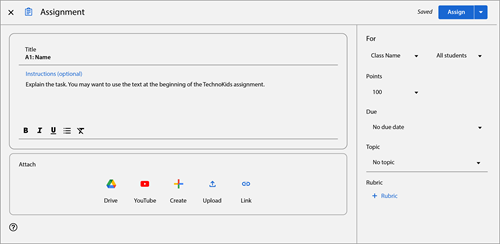
- Type the TechnoKids Assignment name as the title. For example, A1 Spreadsheets and You. In the instruction box, explain the task. You may wish to add text from the start of the assignment.
Text you may want to include:
- Open the attached worksheet and follow the instructions to...
- Open the attached worksheet in Kami. Type in your answers. IMPORTANT: You must SAVE your answers.
- Use the attached template ___ to complete the task.
- In the Your work section, click the Add or create button. Select ___ (e.g. Sheets). Click the newly created file to complete your work.
- Open the file ___ created in Assignment ___. Follow the instructions to continue to work on...
- When done, view Assignment ___. Submit your work by clicking the Turn in button.
- When done, view Assignment ___. Click Add or create. Select the file from Google Drive (or paste a link to the file).
- TIP | You may want to tile your screen so you can see Google ___ (e.g. Docs) and the worksheet at the same time.
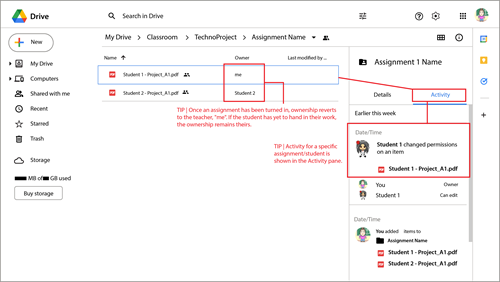
- TIP | To find your work look in My Drive > Classroom > Class Name > Student Name - Filename.
- Attach the TechnoKids worksheet. It is located in the Project > Workbook folder. You should have already uploaded this folder to Google Drive in Step 2.
- Click
 , and choose Google Drive.
- Select My Drive.
- Open the Classroom folder.
- Open the path Class > Project > Workbook.
- Select the assignment and click Insert.
- Open the Project folder uploaded in Step 2. Open the Workbook folder.
- Select the worksheet that matches the assignment number. Click Insert. For example:
- Set viewing options based on the assignment:
- Step-by-Step Instructions Only | Set the option to Students can view file.
- Includes Questions | Set the option to Make a copy for each student.
TIP | If you do not see the Make a copy for each student option , GO BACK and start over. You are not on the Classwork tab (but likely on the Stream tab).
- In the right pane, set a point value, due date, and topic if desired. To decide the points:
- Number of Questions | Assign a value based upon the number of questions students must answer on the worksheet.
- Daily Work | Many TechnoKids projects have students complete a task over a series of assignments. In which case, you are only grading the final product. You may wish to set this type of assignment to ungraded or allocate a daily work value such as 5.
- Marking Sheet | The majority of TechnoKids projects have a marking sheet for the final product. It is located in the Assessment folder. If the assignment has students submit their finished file such as a report or newsletter, allocate the value on the marking sheet.
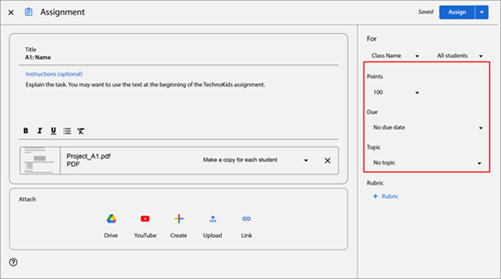
TIP | Create a topic that is the name of the TechnoKids project. (e.g. Candy). This will help to keep assignments organized by project.
- OPTIONAL | IF the assignment requires a template or sample, repeat the steps to insert the file. These resources are located in the Project folder uploaded in Step 2.
Determine the type of file:
- Template | Set the option to Make a copy for each student.
- Sample | Set the option to Students can view file.
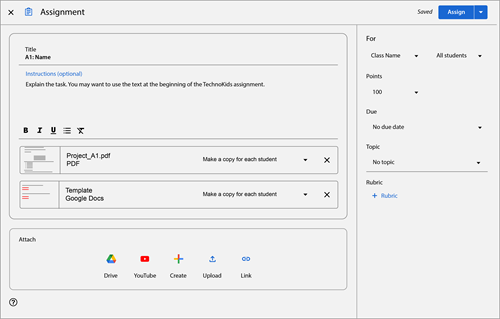
RECOMMENDED | TechnoKids templates are provided as .doc, .ppt, or .xlsx files. Convert these files to a native Google format BEFORE attaching to an assignment. Refer to Step 2 Upload Files into the Class for conversion instructions.
- OPTIONAL | IF the assignment has students make a new file using Google Apps, you can create this file for students while creating the assignment.
- Click Create.
- Select the app from the menu.
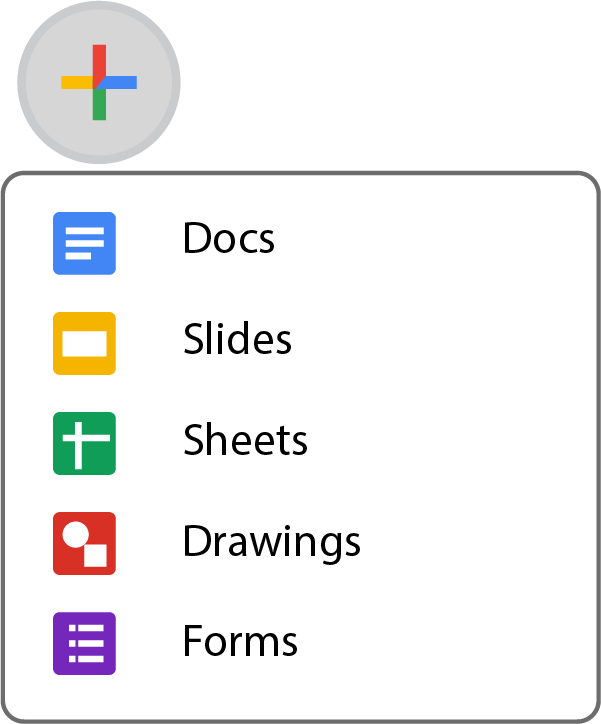
- Set the option to Make a copy for each student.
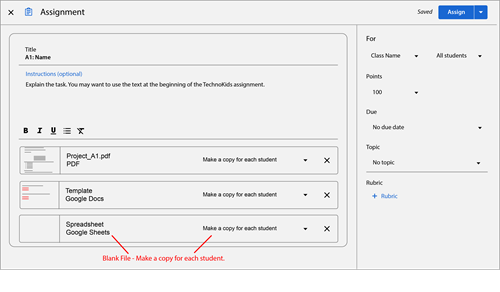
TIP | Verify the assignment has the correct files and settings before hitting Assign. If you selected Students can view the file in error, the attachment CANNOT be modified once the assignment is assignment. Instead, if there is an error, the entire post must be removed and then recreated.
- When all files are attached, click the Assign arrow. Make a choice from the list:
- Assign | Post the assignment immediately.
- Schedule | Post the assignment on a specific date.
- Save Draft | Saves the post and allows modifications before assigning.
TIP | Scheduling an assignment will prevent your students from working too far ahead on their own. If you need to make adjustments to the post before assignment, Save draft allows you the flexibility to do so.
TIPS
>> Delete an Assignment
If you make a mistake and you want to remove an assignment, this must be done from the Classwork tab:
NOTE | In our tests, editing an assignment showed inconsistencies when trying to save the changes. Google is aware of the issue and is working on it. Use Edit at your own discretion. Some options were unavailable such as Make a copy for each student. TechnoKids recommends deleting and starting over.
- Click the Classwork tab.
- Click the More button on the assignment you wish to remove.
- Select Delete. Any grades and comments will also be deleted.
>> Reorder Assignments
When you create assignments, Google Classroom puts the oldest one at the bottom of the feed. This may be awkward when your students are looking for Assignment 1 when there are 30 assignments. Feel free to change the order of the assignments. If you previously deleted an assignment and needed to recreate it, it may be out of order.
TIP | Work in reverse order by choosing the item you want to appear last in the list first and move it to the top. THEN, pick the item you want to be second last and move it to the top. This process will keep putting the selected item at the top and bumping the others down the list order, making the item you picked first appear at the bottom of the list.
- Open the Class in Google Classroom.
- From the Stream tab, click the More button beside the desired assignment.
- Select Move to top.
- Repeat until Assignment 1 (or desired post) is at the top of the list.
>> Assignments in Class Drive
What happens in the Class Drive when you make an assignment?
The Class Drive folder is located on your Google Drive and will have all of the assignments you created, any materials you uploaded, and any work turned in by students. Everything put onto your Google Classroom is automatically saved onto this Drive folder for easy access.
